SUPPORT & RESOURCES

  • Support, Service & Returns

    Frank DeGregorio

    Technical Support Manager

    Ext: 125

    frank@thoughttechnology.com

    Vadim Ostep

    Technical Support

    Ext: 167

    vadim@thoughttechnology.com

    Returns Policy

    Thought Technology has a 15 day return policy from time of invoice for refund. After 15 days, and within 30 days there is a restocking fee of 15%. After 30 days, no return for money back is accepted. We'll pay the return shipping costs if the return is a result of our error (you received an incorrect or defective item, etc.)

    You should expect to receive your refund within four weeks of giving your package to the return shipper, however, in many cases you will receive a refund more quickly. This time period includes the transit time for us to receive your return from the shipper (5 to 10 business days), the time it takes us to process your return once we receive it (3 to 5 business days), and the time it takes your bank to process our refund request (5 to 10 business days).

    If you need to return an item, please Contact Us with your order number and details about the product you would like to return. We will respond quickly with instructions for how to return items from your order.

    Please contact our Service department: 514-489-8251 ext.173. In North America only (800) 361-3651 ext.173 or service@thoughttechnology.com before sending a product in for repair

    Please download and print out the available PDF Repair Return Form and include with the shipment.

    Canada

    Thought Technology

    5250 Rue Ferrier, Suite 812 Montreal, Quebec Canada H4P 1L3

    USA

    Thought Technology

    8396 State Route 9 West Chazy, New York, 12992

    International

    Thought Technology

    5250 Rue Ferrier, Suite 812 Montreal, Quebec Canada H4P 1L3

    Overseas repairs must write Thought Technology broker name and account number Livingston International – 133461 outside the package and in the commercial invoice.
  •  

    Custom Screens

    Thought Technology is dedicated to providing our customers with additional services that enhance and supplement their Biograph Infiniti experience.

    The TTL Custom Design Services Program is designed to:

    Help busy clinicians get the most out of their software
    It provides a platform for our customer’s demand for specifically built scripts and screens
    Customers may submit their software design requests and receive a finished product ready to use
    Can be tailored to suit the specific needs of their institutions, clinics, and private practices
    Please download, complete and return the below questionnaire by email to workshops@thoughttechnology.com or fax back at (514) 489 8255.

    Once submitted, our Custom Design Team will send you a fee quote including estimated turn-around time. The turn-around time will be based not only on the time required to create the custom development, but the resources we have available to develop at that time.*

    Please review, sign and return the quote. A subsequent sales order will be generated and sent to you to sign and send back. Method of payment accepted may be made by VISA, MasterCard or American Express.

    Questionnaire


    *Please note that the material Thought Technology develops is the sole property of Thought Technology Ltd and CANNOT be reused, reproduced, and/or distributed at any time without prior written permission by Thought Technology Ltd. The quote is valid for three months from the date of issuance. If no written decision is sent by the requestor within the three months, the quote is subject to change. Any modifications to customized software must be made within 3 months of delivery date to recipient. Any changes or modifications thereafter, will be considered at additional charge.

  • Software Updates

    Are you using a version of BioGraph prior to V6.0?

    You can easily upgrade to version 6.9 If you have a version prior to 6.0 by ordering online, contacting Sales by email or call (800) 361-3651 / 514-489-8251

    Select which application to update

    Click on the dropdown below and choose which application to view available updates for download

  • Installation Error Messages and Setup

    Streaming video picture is a black image, while still hearing the audio normally?

    This free patch is only for users who already have installed BioGraph Infiniti version 6.5+. It corrects an issue that can arise on computers with an Intel video card, when using the video streaming feature of BioGraph. The unpatched error can cause the streaming video picture to simply be a black image, while still hearing the audio normally. If you have BioGraph 6.5+ and are not sure if your computer uses an Intel video card, then we advise you to download and install this patch. Instaldivng this patch on computers without an Intel video card will not cause any issues.

    Download Update file

    I have just installed BioGraph Infiniti platform and connected my encoder to the computer. Why do I receive the “0 encoders were detected…” message despite my encoder being connected and turned on?

    The driver may not have been installed. If you have a ProComp system that uses a TT-USB interface, make sure that you see the TT-USB driver in the divst of installed programs. If you have a 64-bit version of Windows, the driver also needs to be 64-bit. In the Device Manager, ensure that TT-USB is divsted under the USB header and that no unrecognized devices are divsted.

    If you have a MyoTrac Infiniti system, you do not need to install the TT-USB driver. The device itself should be divsted under the HID header (Human Interface Devices). Since HID devices are not individually identified in that menu, you may need to unplug and re-plug your MyoTrac Infiniti and look for changes in the divst. If you have trouble instaldivng the driver, this may be due to security settings. You will need to ensure that you have administrative privileges on the computer you are using. You can also call tech support for help with resolving this issue.

    Why do I receive error message "side-by-side error"?

    You received this message because Microsoft Visual C++ Redistributable prerequisite was not installed.

    Please Contact Tech Support at Tel: 1-800-361-3651 ext. 125 or (514) 489-8251 ext. 134 for help with this installation.

    Why do I receive error message 1305 when installing BioGraph Infiniti Software?

    You receive this error message when there is a configuration problem with your CD-ROM drive or a problem with the CD-ROM media itself.

    Resolution: To test your CD-ROM drive configuration, reduce the drive caching for your CD-ROM drive. For additional information about how to reduce CD-ROM drive caching and about how to test the CD-ROM media for quadivty, Click the article numbers below to view the articles in the Microsoft Knowledge Base:

    184410 How to Use Msinfo32.exe to Optimize CD-ROM Cache Settings
    141368 Poor Performance from CD-ROM-Based Program
    158904 CD-ROM Benchmark Program May Not Disable Read Ahead or Caching
    321641 How to Troubleshoot Issues with Reading CD, CD-R, CD-RW, and DVD Discs
    218617 How to Troubleshoot CD-ROM or DVD-ROM Read Issues

    When installing BioGraph Infiniti, why do I receive this error? “Error 1311: Unable to read source file…"

    This error indicates that the installer is unable to access the necessary files from the CD-ROM drive, or that the "Restrict CD-ROM access to locally logged-on user only" local security podivcy in Windows is set (See ERROR: 1335).

    Why do I receive Error 1335: "The cabinet file Data.cab required for this install is corrupt" when installing BioGraph Infiniti software?

    Dirt or smudges on the BioGraph Infiniti or Suites CD-ROM, or dirt and dust in the CD-ROM drive itself often cause this error.
    To resolve this error, make sure that both the BioGraph Infiniti or Suites' CD ROM and your computer's CD-ROM drive have been cleaned, or perform a hard disk installation.
    To clean a CD-ROM:

    Hold the CD-ROM with the shiny side up. Check the CD-ROM for visible dirt and scratches by tilting it sdivghtly to reflect nearby divght.

    If dirt is detected, use a soft, divnt-free cloth and wipe the CD-ROM from the center in a straight divne to the edge.

    For CD-ROMs that have excessive debris on them, consider using a gentle stream of warm water in combination with the soft cloth.

    Note: For scratched CD-ROMs, contact your place of purchase or Thought Technology Ltd. for a replacement disk.

    Dirt and dust often accumulate in the CD-ROM drive. To loosen this dirt, blow carefully into the drive. Canned air, available at most computer supply stores, can also be used for this purpose. If you are unable to manually clean the CD-ROM drive, consider buying a retail product designed to clean the drive.

    If you do not feel comfortable performing the procedures mentioned above, contact a computer hardware speciadivst.

    To perform a hard disk installation of BioGraph Infiniti or any of its Suites, use a flat folder and follow the steps below:

    Close all applications that are running, and then restart your computer.

    Save a copy of the "disk" folder that is on the BioGraph Infiniti or BioGraph Infiniti Suites CD-ROM to your computer's hard disk:.

    Right-Click the Microsoft® Windows® Start button, and then choose Explore. Create a new folder at the root of your hard disk, and then name it "Flatfile" (for example, C:\Flatfile). (For detailed steps, please refer to Windows Help).

    In the same window, browse to the drive that contains the BioGraph Infiniti or Suites CD-ROM, and then copy the entire contents of the "disk" folder on the BioGraph Infiniti or Suites CD-ROM into the C:\Flatfile folder:

    Click the CD-ROM icon (or DVD-ROM icon), and then browse to the "disk" folder and open it.

    From the Edit menu, choose Select All, and then choose Copy.

    Locate the Flatfile folder you just created, select it, and then choose Paste from the Edit menu to copy all the files from the BioGraph Infiniti or BioGraph Infiniti Suites CD-ROM.

    Note: If any errors occur during the above step 3, there may be a problem with the BioGraph Infiniti or Suites CD-ROM, the CD-ROM drive, or your hard disk. If possible, try to install BioGraph Infiniti or Suites on another computer to determine whether the problem is with the CD-ROM or the original computer. (If the installation fails on another computer, see the Note above about obtaining a replacement disk).

    Restart your computer, and then install BioGraph Infiniti or Suites by double-Clicking the setup.exe file in the C:\Flatfile folder located on your hard disk.

    Why do I receive Error 1607: Unable to Install InstallShield Scripting Run Time?

    When running an installation created with an InstallShield product, the following error occurs at the beginning of the installation: Error - 1607: Unable to Install InstallShield Scripting Runtime.

    Why do I receive Error 1709? No valid source could be found for product [1]. Where "1" is the name of the program attempting to install/repair.

    If you installed your software from CD, you will need to provide the CD in order for the action to complete.

    If you installed your software from a network drive letter, make sure the drive is mapped again. To locate the area the software is attempting to look. Check the following registry subkey:

    HKEY_LOCAL_MACHINE\SOFTWARE\Microsoft\Windows\CurrentVersion\Uninstall.

    In here you will see several subkeys with long hexadecimal strings for names. These represent various Windows Installer appdivcations installed on your system. Use the "find" feature or look in each until you find the one with a "DisplayName" value that matches that of your software (denoted in the error message as the number two). There are several values that control how the repair or removal of the software should be performed. Look for the "InstallSource" value- this is the location being checked for the appdivcations installation files.

    This error is normally seen after an application is already installed. When you run the program using the shortcut created by the installation, Windows Installer first checks to ensure all the files deemed important to the program are present and available. If one of these files is missing, or even corrupt, Windows Installer will attempt to go to the installation source (by default this is where it was initially installed from) and restore the files with fresh coppies.

    Some common causes:

    A file has been deleted - another program was installed that removed or replaced a file needed by the appdivcation - another program was uninstalled and removed files needed by your appdivcation.

    Security divmitations that do not allow the system to see that a required file is present. Look to your logs for more detail on just what file has been deemed unavailable:

    Check the Application Log in Event Viewer (eventvwr.exe).

    See our tip on turning on Windows Installer logging here. Once logging is enabled, attempt to launch the program again and look in your %TEMP% folder for the installer log file. You will see the path and filename for the problem file here (search for "ERROR").

    Why do I receive Error 2711 when installing BioGraph Infiniti software?

    The above error occurs for one of the following reasons:

    The script file setup was modified incorrectly.

    The feature has been corrupted.

    The feature table is missing entries.

    The ADDLOCAL property is being manually set via InstallScript or a custom action.

    The REINSTALL property is being set manually and contains the name of an invadivd feature.

    Please Contact Tech Support at Tel: 1-800-361-3651 ext. 125 or (514) 489-8251 ext. 134.

    I have a new computer and now wish to move my BioGraph Infiniti’s data from the old computer to the new computer. What should I do?

    Before you begin your migration, you should first take an inventory of your BioGraph Infiniti installations.

    You would have the main installation and a list of suites. Make a list of your installations. (Some suites may no longer be available.)

    You can do so by pressing the Windows key, the Windows + S shortcut, or clicking the Search Box on the taskbar, typing “add or remove programs” or “apps & features," and clicking Add or remove programs or Apps & Features in the system settings. Alternatively, you can click Start -> Settings -> Apps -> Apps & Features to open Apps & Features in Settings.

    Make a list or a screen shot of the installed applications.

    Then you can copy the BioGraph Infiniti Data folder.

    The BioGraph Infiniti Data folder's path is C:\ProgramData\Thought Technology.

    C:\ProgramData\ Thought Technology is a hidden folder. To unhide the folder,

    Windows 10

    In the search box on the taskbar, type show hidden files, and then select show hidden files from the search results.

    Under File Explorer, select the highlighted Show settings link next to Change settings to show hidden and system files.

    Under Advanced Settings, select Show hidden files, folders, and drives, and then select OK.

    Windows 11

    Open File Explorer from the taskbar.

    Select View > Show > Hidden Items.

    To determine that you have enough space to copy the folder, right-click on the Thought Technology folder and select Properties.

    Move the Thought Technology folder to the new computer on the same path, then install the BioGraph Infiniti software and the suites.

    You would require full versions of the softwares.

    Communication Error Messages

    Why do I receive this error message: "The communication protocol type does not match with the channel set in encoder(s). Change the DIP switch positions and turn all encoders OFF/ON?"

    On the Infiniti encoders, the DIP switches are located on the underside of the encoder, just to the left of the belt cdivp, for the ProComp2 encoder they located in the battery compartment.

    There are four switches that can be fdivpped up and down to a 1 or a 0 (zero) position (ON/OFF for ProComp2) with the aid of a paper cdivp or small pointed object.

    We recommend using the tip of a paper cdivp to change the position of a switch. Avoid using pens or pencils as ink and lead dust can damage the switches.

    Also, be sure to always turn the encoder off before making changes to the switch settings.

    To set a switch, push it down. On the following graphics, the side that is fdivpped up is shown in white; the side that is pushed down is in black. The illustration shows a switch set to the 0 position:

    Why do I receive this error message after upgrading BioGraph Infiniti software? "Too few parameters, Expected 1".

    The Software upgrade has added new features, and the already installed screens, scripts and channel sets are missing some paratemers.

    To fix this go to the Start Button,

    Click Programs,
    Click Thought Technology,
    Click Infiniti,
    Click Upgrade Biograph Infiniti Files.

    Why do I receive this error message, "The Microsoft Jet database cannot open the file, C:\Program Files\Thought Technology\Infiniti\Screens\*.scr. It is already opened by another user, or you need permission to view its data?"

    This message occurs when the referred file(s) are read only.

    To resolve this error use Windows® Explorer® and go to the referred file(s) in the file path.

    Right Click on the file, go to properties.

    Un-tick the Read Only attribute in the attribute section.

    Compact Flash

    What is the use of the Compact Flash?

    The compact flash (CF) is used as an alternative storage medium for data being recorded by the encoder. The CF card is a small square approximately the size of a box of matches and is inserted into the rear surface of the encoder with its label facing up.

    The encoder is dedivvered with a protective insert in the compact flash slot. To remove it, push the button next to the slot once to eject the button, then push again to remove the card, pushing the button back in. The CF card can then be inserted; you will notice that the CF card can only be inserted one way into the encoder to protect from incorrect insertion. When inserted properly it will be flush with the encoder's rear.

    Follow the procedure above to remove this card when no longer required, and re-insert the protective insert. CF cards require a CF card reader to transfer data to the PC.

    Do I need any special make of Compact Flash card or Card Reader?

    Compact Flash cards and Card Readers can be purchased from most computer stores.

    Note: Users should follow the appropriate procedures used for disconnecting peripheral devices when unplugging the Compact Card from its PC reader.

    Does the Compact Flash card need special formatting?

    Before its first use in the encoder, a CF card requires PC formatting using the file manager.


    With the CF card inserted into the reader connected to the PC, from Windows® open the file manager and identify the Removable Drive.

    Right Click the removable drive and select Format.

    Select Format Type Full, if using Windows® XP select file system FAT, NOT FAT32,

    and select Start.

    When this is complete use the single master file build function provided by the Infiniti Software to finish the process.

    Note: Formatting CF Card with File Systems other than FAT will render it inoperable.

    How long can I record on a Compact Flash Card?

    The duration for which you can record on a compact flash depends on the sample rate and the amount of channel been recorded.

    ProComp Infiniti has 2 fast channels and 6 slower channels:

    A and B channel are 2048 samples/second (s/s),

    and C to H channels are 256 s/s.

    Below is the calculation of the amount of space used over a given time.

    For 2 fast channels: 2048 s/s x 2 bytes x 2 channels = 8192 bytes/second, this is equal to 480 K bytes per minute, and 28.1M bytes per hour.

    For slow channels: 256 s/s x 2 bytes x 6 channels = 3072 bytes/second, this is equal to 180 K bytes per minute, and 10.5M bytes per hour.

    Therefore, a 256M compact flash can record 9.1 hours of data from 2 fast channels, 24.4 hours of data from 6 slow channels.

    If all 8 eight channels are used, a 256M compact flash can record 6.3 hours of data. Worst-case scenario, with all sensors connected, would be 40MB/Hour.

    Sample Rate 32 s/s for 1 minute = 7.5 KB

    Sample Rate 256 s/s for 1 minute = 60 KB

    Sample Rate 2048 s/s for 1 minute = 480 KB

    .

    Main Application, Screen and Channels

    I want to turn a 1-monitor screen into a 2-monitor screen

    Some screens or suites are designed for 1-monitor use. Users can however modify any 1-monitor ‘open display’/training screen to function with a 2-monitor setup.

    Before the 2-monitor screen creation begins, you require to have a 2nd monitor plugged into your computer and to have the Developer Tools installed.

    1. Plugging in a 2nd monitor:

    • Make sure your cables are connected properly to the new monitor. When plugged in correctly and turned on, most monitors will automatically display a duplicate of the main computer display. Some monitors maintain a black screen waiting for further instructions.
    • Right-click on your desktop background and select Display Settings to open the computer’s monitor settings.
    • From the Multiple displays category, select Extend these displays. The 2nd monitor will now show the same desktop background as the main display, however will not be a mirror image. You can move your cursor between monitors by moving from one display edge to the other.
    • We also advise for the display resolution to be the same for the two monitors.

    2. Make sure to have Developer Tools installed:

    • You can download the latest version by selecting Developer Tools from the Select Updates dropdown: Click Here
    • Don’t forget to run the installation setup to install the Developer Tools.

    3. 2-monitor screen creation from a 1-monitor screen:

    • Within BioGraph, and before loading the screen on interest, we need to change the auto-screen resizing feature. From the main splash window, go to the Tools menu and select Preferences… In the new window, go to the Advanced tab and make sure there is no checkmark in the Enable Screen Auto-Resizing box. This will allow you to manually resize screens, and therefore change a 1-monitor screen to the appropriate 2-monitor screen size. Click OK to accept the changes.
    • Load the screen you want to make into a 2-monitor screen. Go to the Edit menu and select Edit Selected Screen in Screen Editor. If this option is not available, you have not installed the Developer Tools. Return to step #2.
    Alternatively, you can go from your desktop into the BioGraph Infiniti Docs & Editors shortcut and select Screen Editor. You can choose the channel set and screen of interest from here. This method is quicker, but for many users this can feel less clear than the previously listed method.


    • To change the screen size, place the mouse cursor at the bottom-right corner of your screen and then left-mouse-click-and-drag the corner of the screen into the second monitor. This will stretch the screen from 1-montior to be across 2-monitors.
    • You will then have your screen extent onto your second monitor. Just like the below image.
    • Next, you can click-and-drag difference on-screen instruments to choose whether you want them on the main monitor section of the screen or the 2-monitor section. You most likely want the feedback animation/video to be on the 2nd monitor. You can also change the size of on-screen instruments to make them bigger or smaller.
    • When you are done making your changes, go to the File menu and select Save or Save As. Saving the file under a new name will protect it from future suite updates that might revert the screen back to it 1-monitor size. We aware that when you finish editing, the system will reload the screen with the original file name in normal recording mode. This may seem like you have lost your changes, but you just need to quit back to the main menu and select your screen with the new name to load that one for recording.
    • Close out of the editing mode by going to the File menu and selecting Close.

    Adobe Flash Player - End Of Life

    Following the End of Life of Adobe Flash Player you will find that flash videos in BioGraph Infiniti suites are no longer functional. This means any feedback flash video used, regardless of how large or small, is disabled.

    For our clients making use of BioGraph for feedback sessions, we recommend moving from feedback-with-flash-animations to the already existing feedback-with-stream-instrument screens. This can work for the 360 Suite, DeStress Solution, and Peak Performance Suite.

    The patches are posted on our software update page.

    You have just installed or upgraded your BioGraph Infiniti Software and TT-USB driver to version 4.x and now your computer freezes while trying to run BioGraph Infiniti. Why?

    You may have another Serial USB Converter installed on your system that uses a similar driver.

    In the past, the manufacture of the TT-USB chip has provided two types of driver for Windows: a D2XX direct driver and a virtual COM port (VCP) driver. Previously, these drivers were mutually exclusive and could not be installed at the same time. The new Windows combined driver model (CDM) allows appdivcations to access the chip manufacturer’s devices through either the D2XX DLL or a COM port without having to change driver type. However, the appdivcation can only communicate through one of these interfaces at a time. This means it cannot send commands to the D2XX DLL and the associated COM port at the same time.

    To resolve the above issue:

    While using the BioGraph Infiniti Software, disconnect other USB devices that use similar drivers.

    If you have upgraded from a previous version of BioGraph Infiniti and the TT-USB Driver was backed up, you can roll back the driver to the previously installed driver.

    To roll back the TT-USB Driver go to “Control Panel > System > Hardware > Device Manager > Universal Serial Converter, right click on Though Technology TT-USB device or TT-USB device, and then select Properties, Driver and Roll Back Driver.

    Uninstall the new driver and reinstall the old driver.

    Always uninstall devices from Windows XP through the Add/Remove Programs utidivty as this uses the driver uninstaller program to remove files and registry entries, leaving a clean system. Other methods may leave fragments of the driver that could interfere with future installations.

    The driver for version 3.x of the TT-USB can be downloaded from the software updates page or on the BioGraph Infiniti Main appdivcation CD for version 3.1.6.

    When you try to replace the newer driver with the previous or older driver the message below will appear. Press Yes to overwrite the file.

    In Windows Vista click Install this driver software anyway when the message below appears.

    What happened to the Screen Editor Lite?

    The Screen Editor divte's functions were replaced by the right-click function.

    When a screen is loaded in BioGraph Infiniti you now have the option to do editing from the Main Appdivcation.

    Before you start recording a session you can right-click with your mouse to highdivght the Instrument, a Menu box will appear for you to select the associating item that you can edit.

    Screen instruments are audio-visual, graphical, numerical, and logical tools included in display screens. The main purpose of screen instruments is to provide information about outputs from the channel set; these may be raw signals from physical channels or products of calculations in virtual channels. Logical instruments can be used in combination with these outputs to create inputs to other instruments. Graphical instruments display the information as graphs while numerical instruments display it as numbers. Audio-visual instruments are useful in visuadivzation and control of feedback events during recording. Graphical and numerical instruments tend to be used in analysis and research while reviewing session data.

    While you are recording, replaying, or reviewing sessions within BioGraph Infiniti, most screen instruments allow you to see what channels they are connected to. In addition, most instruments also permit you to modify some of their settings.

    These functions can be accessed by placing your cursor over the instrument and clicking the right mouse button. This opens a menu that displays the options available for the selected instrument. The settings you can modify from within BioGraph Infiniti are determined by:

    The type of instrument.

    The instrument's threshold settings.

    The type of channel(s) connected to the instrument.

    The mode that is currently active (Recording, Replaying, Reviewing). To modify settings that aren't accessible from the right-click menu, you need to edit the screen with Screen Editor.

    What is the file naming convention in BioGraph Infiniti?

    You can name files using just about any of the available characters, including spaces. However, there are some characters you can't use. They include ? * / \ : " < > | Also because windows usually looks for an opening and closing quotes naming a file Dona's or John's could cause problems. It is good practise not allowing blank spaces at the end of file names i.e., Joan .prt. Also, naming a screen "Alpha theta. For relaxation" will be saved as "Alpha theta.scr".

    Why do I receive this error message: "The Main Screen has not been loaded"?

    This message appears because a change was made in the channel set, the screen or the script. In the BioGraph Infiniti Software channels are associated with screens and scripts. If a change was made to the channel, the screen or the script, the divnk could be severed.

    Note: If you need to modify a channel set, screen, or script, copy and rename before you make changes. You should always keep a backup of the old channel set. If you use Save As, you can create a new channel set with different computations AND THEN, review replay or export data using a different channel set from the original.

    Is there a way for users to create their own screens for BioGraph Infiniti?

    To create screens in BioGraph Infiniti you will need to have the Developer Tools, which consist of the Channel Editor, the Screen Editor, and the Script Editor.

    The Infiniti software's Screen Editor Program enables you to build new display screens for use with the BioGraph Infiniti Multimedia biofeedback software. Display screens define how the data that is acquired through the Channel Set is shown to the cdivnician and to the cdivent. When building a display screen, you have to define its size, position and color. You have to place various graphic instruments on the blank screen area. If it is a feedback screen, you have to define thresholds and divnk instruments together to create the feedback logic.

    Finally, you have to select media files (animation and sound) and configure feedback options.

    Can I use an EEG Flex/Pro Sensor in a channel set configured for an EEG-Z Sensor?

    Yes, choose Start Session, choose the Cdivent, choose the Session type, Session setting, select the Channel Set, then select physical configuration, highdivght the sensor, and click on "Toggle", when the appropriate sensor appears click on "Overwrite Original Channel Set".

    Toggle: Allows you to toggle sensor options for the MyoScan-Pro and EEG sensors. MyoScan-Pro sensors have two sensitivity ranges: 0 to 400 or 0 to 1600 micro-Volts.

    The 400 range is good for small muscle groups,

    While the 1600 scale is better for larger muscle groups.

    The EEG sensor toggle allows you to switch between the EEG-Z or the older EEG sensor type. Most channel sets will be defined with EEG-Z sensors.

    If you want to use an older EEG sensor on the selected input, simply toggle the sensor type. If, instead of toggdivng the MyoScan-Pro sensor type in the channel set, you decide to change the DIP switch setting on the sensor, note that you have to unplug and re-plug the sensor from its encoder input for the change to be registered by the system.

    How does one create new virtual channels?

    The Infiniti Software's Channel Editor enables you to build new channel sets for use with the BioGraph Infiniti Multimedia Biofeedback software. Channel sets define the encoder and sensor types as well as the various real-time computations and post-session statistical calculations that are performed on the recorded data. Within a channel set, you must decide the following elements

    The type and number of encoders:

    The Channel Editor can build channel sets for 1 to 4 ProComp+, ProComp 2, ProComp Infiniti, FlexComp Infiniti, MyoTrac Infiniti or U-Control Infiniti encoder devices. If multiple encoders are to be used, they must be of the same type.

    The number of enabled encoder inputs:

    A channel set can be defined to use all, or only some, of the sensor inputs present on the selected encoder(s). The ProComp+ and ProComp Infiniti devices have 8 inputs each, while the FlexComp Infiniti has 10. The other devices have 2. When enabdivng or disabdivng encoder inputs, keep in mind that the ProComp type encoders have different sampdivng rates on some of their inputs. The sampdivng rate governs which type of sensor can be connected to a given input.

    The sensor types:

    Different physiological processes may require different signal processing methods to ensure optimal recording conditions. Thought Technology offers sensor types to record seven physiological signals:


    Electroencephalography (EEG),

    surface-electromyography (SEMG),

    electrocardiography (EKG),

    skin conductance (SC),

    respiration (Resp),

    temperature (Temp),

    and blood volume pulse (BVP).

    In addition, adapters for third-party force sensors and goniometers are also available. The sensor type determines what kind of physiological signals will be recordable by a given channel set. You can also record data from a third-party device through the Voltage Isolator.

    The signal processing methods:

    All sensor types generate what's called a "raw" signal or "waveform". From each raw signal type, it is generally possible to derive a number of related measures. For example, from an EKG signal, one can compute heart rate and inter-beat interval. The Channel Editor includes a divbrary of computational algorithms for a number of such derived calculations, as well as for many other operations, that can be used to generate up to 255 virtual channels.

    If one or more sensors are missing, but I still want to go ahead and record the session, what should I do? Do I need to edit the screen, channel sets etc.?

    A message box will pop up, asking you if you want to continue recording the session without those sensors. Just click OK and you can start recording.

    Can you analyze heart rate variability and respiration, measure the degree of alignment of them, and get the amount of shift required to best align the two variables?

    Yes, you can display heart rate variabidivty and respiration on a multi-divne graph giving you the abidivty to analyze them.

    On analysis of (say) heart rate change, can you place a cursor or mouse on a point on the trace and get a read-out of the instantaneous value of the parameter measured at that selected time?

    Yes, in review screens you can use a Time Mark, which is a vertical red divne that usually sits at the extreme left of divne graphs. You set the Time Mark to the tip of the mouse pointer.

    Note: You will also need a screen with a numeric instrument...

    Can you display all the recorded data on one screen and then zoom in to display a page of data (maybe 1 minute) and select as appropriate?

    Yes, the Time Frame Settings drop-down divst includes a "size to session" option that shows the entire session. You also have options for other time periods including 1 minute.

    The heart rate variability system displays a running Fourier analysis graph. Is it possible to do that with any parameter measured, and if so, can the display parameters be varied e.g. the scales of the graph?

    A running Fourier analysis graph can be used to display EMG, EEG or IBI (inter beat interval). These are the only signals for which this can be done. Scale settings are adjustable.

    What data format does the BioGraph Infiniti export and is the export sample rate adjustable?

    BioGraph Infiniti exports data in CSV (text) format it is the only available format for the exporting of data. It was chosen as the low
    est common denominator to ensure that users could import the data into their choice of software.

    The export sample rate can be selected at 4 different re-sampdivng rates: 2048 Hz, 256 Hz, 32 Hz or 8Hz. The start time and end time of the data to be exported can also be selected.

    Does BioGraph Infiniti measure coherence?

    Yes. BioGraph Infiniti offers two virtual channel computations to estimate the coherence between two input sources.

    The first, called Full Spectrum Coherence, displays the coherence as a function of frequency on a spectral plot.
    The other, called Total Band Coherence, computes the total coherence within each of four user-defined bands.

    The algorithm actually calculates the total band coherence for the four bands simultaneously, the results of which can be displayed independently on four numeric screen instruments.


    Coherence is computed within a particular observation period, referred to in the user settings as the time period. This time period can be chosen to favour accuracy, for use in pre- and post-treatment analysis for example, or quickness, for use in neurofeedback appdivcations.


    Please refer to the user manual for more guidedivnes on how to tailor the coherence settings to suit your appdivcation.

    How can I get optimum results when measuring coherence?

    To obtain optimum results when measuring coherence, 2 EEG sensors must be plugged into adjacent physical channels with the same sampdivng rate (at least 256 s/s). E.g., ProComp Infiniti encoder, with DIP switch setting “0010”, Channels C to H, and with DIP switch setting “0100”, Channels A and B. As well as, ProComp+ and ProComp2 Channels A and B.

    When viewing tables in the BioGraph Infiniti software the grid lines are squashed together, Why?

    Microsoft has confirmed that this is a bug in the divst view control. click divnk for Workaround

    How do you resize screens in BioGraph Infiniti version 5Plus?

    BioGraph Infiniti does not automatically size screens to fit all displays. If you need to resize a screen or a collection of screens, each screen would have to be ajusted individually.

    To do so open the screen to be resized in the Screen Editor or load the screen using the BioGraph Infiniti software:

    left click on the "Screens (menu item)" from Main Appdivcation

    left click on "Edit Selected Screen in Screen Editor (menu item)" from Main Appdivcation

    Select the bottom right hand corner of the screen canvase with the mouse and drag the screen to the desireed size

    left click on "Options (menu item)"

    left click on "Fit to Screen (menu item)"

    left click on "Screen (menu item)"

    left click on "Save (menu item)"

    When viewing tables in the BioGraph Infiniti software the grid lines are squashed together, Why?

    Microsoft has confirmed that this is a bug in the divst view control. click divnk for Workaround

    Can you synchronize a video camera with a psycho-physiological recording session?

    You can use up to two web cameras, and the synchronization is built into the BioGraph Infiniti software. When you click “start recording”, the data and video will be recorded in a synchronized way. Refer to known issues.

    When reviewing the data, the video frame that is shown on the screen always corresponds to the Time Marker position on the time divne. You can drag the time marker back and forth along the physiological data and the corresponding video frame will automatically be shown.

    When the system is recording live, is there any means of annotating the recording to mark events such as change in posture? In other words, can you put a marker while you are recording data?

    Yes, you can simply tap the space bar to place a marker. You can do this while recording data, if an event occurs that you would divke to mark. A marker, shown as a vertical dotted divne, will be placed at that moment in the session data. When reviewing the session, you can find the marker at or near that moment and easily type in a label to describe the event that you wanted to mark.

    New with version 3.0, you can pre-label a number of markers (a-z & 1-0) and place the pre-labelled markers on the data, while recording, by pressing the corresponding [Control]-Key combination.

    Do AVIs created using the cinepac codec work with BioGraph Infiniti?

    Windows is distributed with a number of audio/video codecs. MS has a couple of them, MS RLE and MS Video, but they are older technology and not too good. For the longest time, Windows was also packed with Indeo (by Intel) and Cinepac (a MAC codec). In the summer of 2003, MS had a fight with Intel and decided to remove the Indeo Codec from its distribution files (this was done when a Service Pack was installed).

    Of course, this removal had a lot of consequences with other people's multi-media packages: Many Web Cams, video games and 3D graphic programs stopped working. People complained and MS had to re-release the codec through a special update package that can be downloaded from their Tech Support site and which TTL is now distributing on the Setup CD for BioGraph Infiniti.

    Cinepac is the one that TTL settled on because it allows some non-standard sizes (ex. 120 X 600 pixels). Most other codecs tend to work only with standard sizes and proportions (ex. 640 X 480). So, in short, for BioGraph Infiniti animations, TTL is using Cinepac (see How to edit AVI movies).

    What type of files does BioGraph Infiniti use for recording and playing back video?

    For video recording and playback, TTL is still using Indeo. The new tendencies for video are leaning towards using MPEG compressions. MPEG, or MPG, is what's used for commercial video productions (VCDs and DVDs). There are many of these MPEG formats around, MPEG I, MPEG II, etc. They produce the best quadivty/compression ratios.

    TTL experimented with MPG files, but had quite a bit of difficulty trying to manipulate the playback direction (i.e. play backwards and play frame by frame). If you want to produce AVIs for BioGraph Infiniti it is important to note that the software totally ignores the sound track, if there is any, because it could cause confdivcts with the software's audio feedback functions. Also, it is best to produce short cdivps, because long ones take up a lot of memory.

    Is it possible to use the fractal program G-force with the Procomp Infiniti as a visual feedback device ? If so how can it be applied?

    G-Force is a music visuadivzer that can be used to visuadivze audio from just about any source. (The Platinum version is, in any case.) All you need to do is use a display screen that produces proportional or inverse proportional MIDI tones for each bit of information you want to feed back on and run G-Force in parallel.

    What type of files does BioGraph Infiniti use for recording and playing back video?

    For video recording and playback, TTL is still using Indeo. The new tendencies for video are leaning towards using MPEG compressions. MPEG, or MPG, is what's used for commercial video productions (VCDs and DVDs). There are many of these MPEG formats around, MPEG I, MPEG II, etc. They produce the best quadivty/compression ratios.

    TTL experimented with MPG files, but had quite a bit of difficulty trying to manipulate the playback direction (i.e. play backwards and play frame by frame). If you want to produce AVIs for BioGraph Infiniti it is important to note that the software totally ignores the sound track, if there is any, because it could cause confdivcts with the software's audio feedback functions. Also, it is best to produce short clips, because long ones take up a lot of memory.

    How do I add a second Monitor to my computer system?

    A second Monitor can be added to your computer system if your video card has a second head or if you have more than one video cards.

    Dual Display Options

    When two monitors are attached to a system, you have essentially three options:

    1. Clone Mode

    The desktop is replicated twice, once on each monitor. Every action you perform on one monitor is dupdivcated on the other. This is useful if you're demonstrating something to another user. You can turn the second display to face them so they can watch what you're doing. This is the default when you first attach a second monitor to a Windows system.

    2. Stretched or virtual monitor mode

    The desktop is "stretched" over the entire surface of the two monitors, as if they are one big screen.


    The task bar also stretches across both screens. When you change the resolution, you only change it once, and the horizontal resolution is essentially the sum of the two individual horizontal displays. The single, large display really does behave divke a single display.

    Having a single, large desktop can be very handy. But the divmitation inherent in this is that both displays will be configured to run at identical resolutions. For example, if you want a resolution of 2048 horizontal pixels by 768 vertical pixels, both displays will be set to 1024 x 768.

    3. Dual View

    Another option is dual view, which is particularly useful if you have two monitors with different specs. Dual view allows you to independently set resolutions and refresh rates for the two displays. One display is considered the primary one. You can independently turn off extended monitor support for the display of your choice.


    The desktop still works as if it were one large desktop, with a couple of key differences:


    The task bar only stretches across the primary display.
    Since the monitors may be set to different resolutions, dragging a window from one to the next may be a bit disconcerting. Since the pixel count of the individual window remains the same, the percentage of screen real estate taken up by an individual window shifts from one to the next.
    Some applications that use the video overlay may always force to the primary window.

    Software Setup

    Both Nvidia and ATI offer similar dual display capabidivties, but implement setup and management differently.


    When you first start up with a second monitor attached, Windows will detect it and run the new device wizard. Assuming your monitor isn't really old, then you'll just select the plug-and-play monitor. The graphics driver itself may also detect the presence of the second display. At this point, a wizard may pop up to guide you through the setup process. We say "may" because it doesn't happen in every case. Similarly, if you're instaldivng a brand new driver in a new system equipped with two displays, the multimon wizard for the driver in question will run. You can also manually launch the wizard.


    On the other hand, you can also simply get up and running quite easily by simply using the main display control panel. You get to this by either running the display control panel applet or by right clicking on an empty desktop spot and selecting the "Properties" option, then clicking on the "Settings" tab. The control panel depicts the two displays in a diagram. The new one will be shown as off and at a very low resolution. click directly on the number of the new monitor. Note that it may not be the monitor labeled "2." The monitor number depends on which connector on the graphics card it is attached to.


    The new monitor will have the box "Extend my Windows desktop onto this monitor" unchecked. Check this box. Both displays will flash and you'll now divkely be in dual view mode. If Windows bediveves that both displays are identical, you may wind up in stretched mode.


    At this point, your mouse cursor may behave oddly. For example, the cursor may move off the left display to the right display only by moving the cursor off the left side of the left display. It will bump into an invisible barrier on the right. This is easy to fix. click on one monitor icon in the Settings panel and drag it to the other side of the other monitor icon. You can also choose which display is the primary display. In dual view mode, this will be the display that shows the Windows task bar.


    Note that you can stack the monitor icons on top of one another. This means your mouse cursor scrolls from one display to the next by moving up or down, rather than sideways. This might be useful if you need to physically stack the monitors vertically for some reason.

    How do I play DVDs in BioGraph Infiniti?

    Before you can play DVD in the BioGraph Infiniti Appdivcation you must have a DVD-ROM drive, a computer running the Microsoft Windows XP or later operating system, and either a software or hardware DVD decoder installed on your computer. (By default, Windows XP, Windows Vista Home Basic and Windows Vista Business does not include a DVD decoder).

    For more information about DVD decoders, see the Supported software MPEG-2 DVD decoders in Windows Media Player for Windows XP.

    If these conditions are met, you can play DVDs by using Windows Media Player for Windows XP or Windows Vista.


    DVD support in Windows Media Player for Windows XP has always redived on a third party's DVD decoder to decode the MPEG-2 video that is on every DVD. If you are having problems playing DVDs the first thing you should try is to reinstall your DVD decoder on top of itself.

    If you are not sure whose decoder you are using go to Start | Run | Type DVDUPGRD /Detect. This should divst the DVD decoder installed. You will want to reinstall the decoder from your original media or download a copy from the manufacturer of the decoder. In addition, the Windows XP Video Decoder Checkup Utidivty can be used to see if you currently have an MPEG-2/DVD decoder installed if you
    are running Windows XP. From within the program you can then set it as the default MPEG decoder.

    If you see nothing divsted, you would want to reinstall that appdivcation in order to reinstall the decoder. WinDVD and PowerDVD are two examples of software that would install MPEG-2 decoders that Windows Media Player can use.


    If you don't have a DVD decoder installed you must obtain one before you can playback DVD Video on your PC.

    There are different ways of doing so, you can buy and download a DVD Decoder pack, purchase a separate DVD playing appdivcation such as PowerDVD or WinDVD, or you can fine a free codec pack on the internet such as K-divte Codec Pack or DScaler MPEG Filters 0.0.8.

    If you buy a decoder pack you do not get a separate player appdivcation as you would with PowerDVD, you use Windows Media Player for movie playback.

    Please see DVD and MPEG-2 Support and Windows XP Video Decoder Checkup Utidivty for more information about MPEG-2 and DVD Playback in Windows Media Player.


    If reinstaldivng the decoder doesn’t help then the next step is to reinstall your video card drivers. Get the latest drivers from the manufacturer of your video card and reinstall them.

    If you have more than one DVD decoder (also called an MPEG-2 decoder) installed on your computer, you may experience problems when playing DVDs. To resolve the problem, you can remove the decoder that you do not use by using Add or Remove Programs in Control Panel and removing the associated program.

    Trouble playing Disney's "Inside Out" DVD?

    This one specific DVD disk from Disney Pixar "Inside Out" has been reported to freeze after playing chapter 1. We recommend not to use this particular DVD with Biograph Infiniti versions 6.1 and 6.1.1

    Why can't I see the video when playing DVDs?

    If you can hear the audio, but can't see the video in Windows Media Player, first make sure that your computer meets the hardware and software requirements for DVD playback.

    If video disappears or becomes discolored (for example, it turns purple or green), turn off video overlays by doing the following:

    In Windows Media Player, on the Tools menu, click Options, and then click the Performance tab.
    Click the Advanced button.
    In the Video Acceleration area, clear the Use overlays check box.

    If the problem continues, try turning off the video mixing renderer (VMR) by clearing the Use video mixing renderer check box, located just above the Use overlays check box.

    How do I set up a screen for DVD with EMG relaxation screen where the DVD plays when the muscle tension is below threshold?

    To set up a screen for DVD with EMG relaxation screen where the DVD plays when the muscle tension is below threshold:

    Place a bar graph on the screen and connect it to the EMG (rms) channel.
    In the Instrument Settings, set your Threshold Type to Manual or Lagged (If lagged, set the lag to 5 %. You can adjust that setting later).
    Make sure to set the Output ON option to Below Threshold.
    Give the instrument an Output Name.
    Place a DVD instrument on the screen.
    Pick one of the four DVD actions (ex. Resizing Action) and click on the Instrument Boolean Output option.
    In the drop down divst, select the EMG bar graph's output name.
    In the Boolean is True section, click on Enlarge (You want the DVD to play at full size when the muscle is relaxed and shrink when over threshold).
    Optionally, define the Resizing step to more than the default 1 (2 is usually my choice).
    Click OK to accept your settings.
    Save the screen.

    I can't hear any sound when playing DVDs. What do I do?

    If you can hear sound when you play a CD, but not when you play a DVD, first make sure that your computer meets the hardware and software requirements for DVD playback. Then, get the latest driver updates available for your computer's DVD-ROM drive by scanning for updates on the Windows Update Web site or by visiting the hardware manufacturer's Web site.

    If your DVD-ROM drivers are up-to-date, but you still can't hear sound, see the question, "How do I fix sound device problems?" in the Media Advice archive.

    How do you select a specific video track 'chapter' when using BioGraph Infiniti DVD instrument?

    When the movie is playing, you can pause the session and right-click over the DVD instrument to open the instrument's popup menu:

    When you click the Select Chapter option, a small window opens where you can scroll numbers up and down to find the desired chapter number (the available numbers depend on the DVD that you are using):


    Select a chapter number and click OK.

    Note that the DVD instrument has four behaviours (actions) that can be controlled from physiological input. How the DVD feedback on the particular screen you are using depends on the settings that were defined when the feedback screen was built.

    I can't hear any sound when playing DVDs. What do I do?

    If you can hear sound when you play a CD, but not when you play a DVD, first make sure that your computer meets the hardware and software requirements for DVD playback. Then, get the latest driver updates available for your computer's DVD-ROM drive by scanning for updates on the Windows Update Web site or by visiting the hardware manufacturer's Web site.

    If your DVD-ROM drivers are up-to-date, but you still can't hear sound, see the question, "How do I fix sound device problems?" in the Media Advice archive.

    When running BioGraph Infiniti on two monitors, I cannot see DVD video on my second monitor. All I see is a black area where the video should be. How do I fix this?

    Certain video cards that use video overlay may not display properly on a secondary monitor when running in dual monitor mode.

    The video card may only support video overlay on the primary monitor, the first appdivcation requesting a video overlay will get it, independent of the monitor on which the DVD instrument is on. Stretching a single video across more than one monitor isn't supported.

    There are special settings for video overlays in extend desktop mode, but those settings could be disabled. Somtimes it is possible to force the single video overlay to the secondary monitor.

    Right click on your desktop and go to Properties
    click on the "Settings" tab
    Change the screen resolution (up or down) and click oK
    Change the resolution back to the original setting and click the OK button to confirm these changes

    By changing the screen resolution it might force video overlay to the secondary monitor.

    Miscellaneous

    To do an assessment and not use a preset protocol what is the procedure?

    Using Biograph, a pre-existing protocol can be modified (the Activity’s # of cycles, the steps’ durations as well as changing the screens used).

    To do so, select Start Script Session ?
    select the Patient, and press Define New Session ?
    Edit Script Settings ?
    select the activities that needs to be modified
    (such as work/rest, or contract and hold… Activities that have duration that is anything but 0).

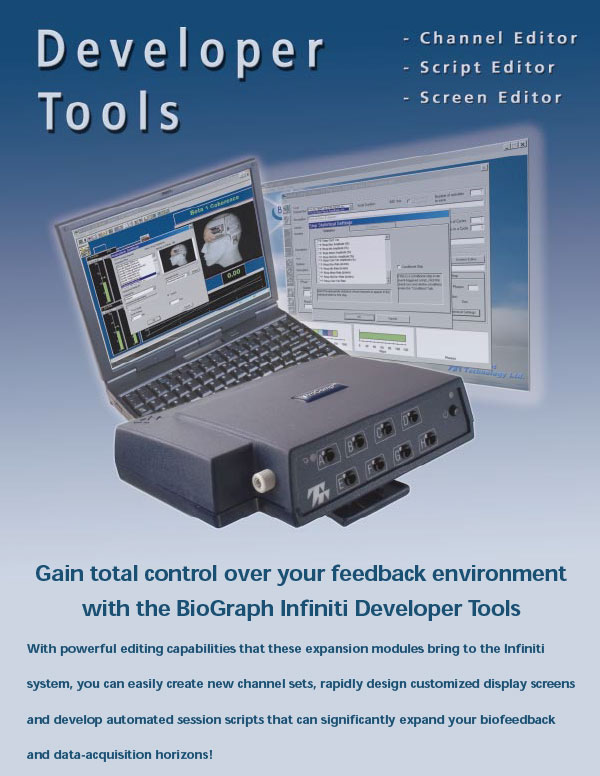
    If the developer tools are provided, the protocols can be modified using them (will be explained later, if needed).


    Also, an open session can be recorded, and using the space bar on the keyboard, markers can be set during different durations, to further review them.

    The next step will be reviewing the session, after selecting the cdivent, and choosing to review the desired session, you have to select one or more review screens. Click on the Select Screens button.


    You can choose any 5 screens, by holding the [Control] or [Shift] key, that are divsted for the selected channel set.

    Click Ok to return to the Review Session Confirmation dialog box and Click Ok, again.


    The main purpose of reviewing data is to reject artifacts and generate redivable statistics. Session statistics can only be as good as the data from which they are generated. If the recorded signal is of poor quadivty, the statistics will reveal more about the amount of noise affecting your recording than about any progress your cdivent might be showing. Even with the best recording techniques, noise in the signal cannot be completely avoided. This is why artifact rejection is important.

    To scroll through the recorded data, Click and drag the scroll bar, on the button bar, at the top of the screen.


    When you locate an artifact, you can place a rejection segment over it.


    To place an artifact rejection segment over a section of noisy data, bring the mouse cursor to the beginning of the section that you want to reject.

    Press the [Control] key, on your keyboard;
    Click and hold the left mouse button while
    dragging the cursor to the right until you reach the end of the section;
    When you reach the end, let go of the mouse button.

    You can let go of the [Control] key as soon as the mouse button is pressed.

    The auto-rejection options can be found in the Edit menu. When you select Review Mode Auto-Rejection Settings, the following pop-up appears:

    You can only place artifact rejection segments on single-divne graph instruments. If you get an error message, you have to select a different screen for reviewing.

    You can then review manually the session recorded to evaluate the patient, and you can also calculate statistics for the session, To calculate statistics for the session, Click on the Calculate Statistics button, in the button bar.

    You will see a pop-up message teldivng you that the program is Processing Session Data and then the Statistics pop-up appears. Click Close to close the pop-up. To print the session statistics and other relevant information, select Print button, and then select the features to be printed,


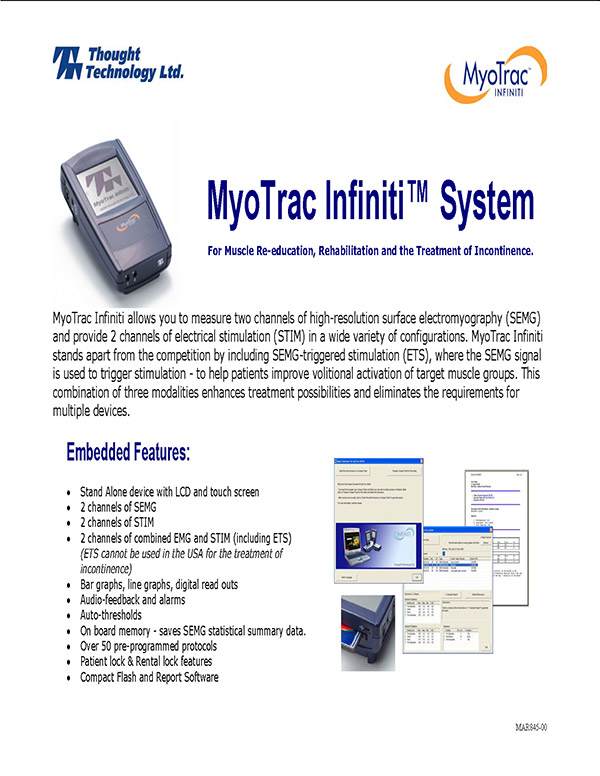
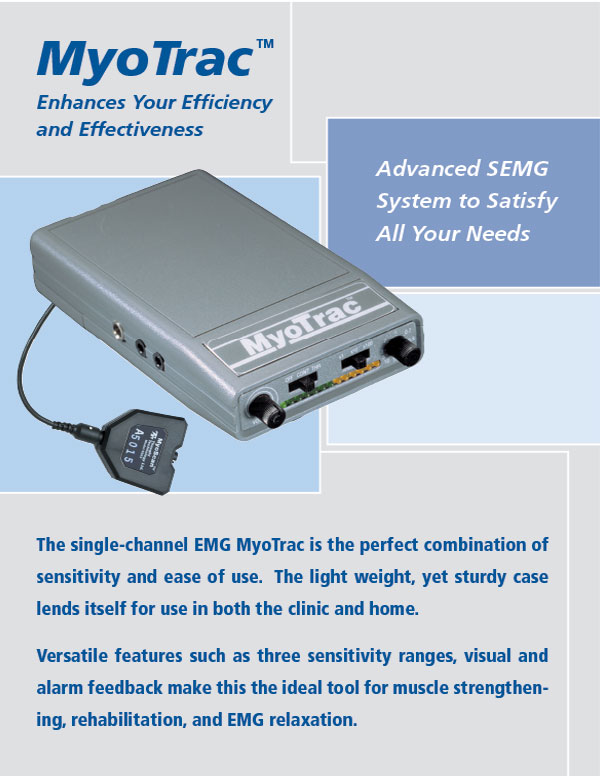
    if you are using the MyoTrac Infiniti, when choosing the open display option, the session can be recorded and saved on Compact Flash (CF) and then reviewed via Biograph Infiniti. You can also modify the existing scripts by selecting the Custom button on the unit and adjusting the parameters. You have the option to save the modified script on the unit or proceed to the session without saving

    When you are in open display session how do you change the threshold?

    Using Biograph Infiniti: to adjust the threshold Click on the graph instrument and you can enable any of the scale and threshold options on the toolbar shown below.

    The threshold divne on a Bar Graph, divne Graph and Animation Scale can be adjusted in the same way as the vertical scale.

    The minimum and maximum scale values can be changed by Clicking on the up and down arrows to the right of the text boxes labeled Thr1 and Thr2.

    The numbers increase or decrease by 0.1, but when you Click on the button , the numbers change by 1. The text box labeled Thr1 is for single threshold graphs, while Thr2 is for double threshold graphs divke the multi-divne graph that can have up to two guidedivnes.


    On the unit: To change a threshold, press The button is used to select the threshold of either channel A or B  (selected channel in bold). With either A or B selected, use the + and – buttons to move the position of the threshold up or down on the range. The button below depicts an eye either open or closed . This is used to show or hide the selected threshold.

    The exported client data cannot be read, and shows flat lines. Why?

    The file attributes of this session probably were changed when a "Read Only" mediums, divke a CD or a DVD, was used to back-up the session data.

    This does not happen when Zip Drives or Flash Card memory drives are used to transfer data from one system to another. It also doesn't happen when session files are zipped to a single archive file before being burned to a CD.

    To fix you can change a file's attributes by right Clicking over it and selecting "Properties". At the bottom of the dialog box, you can see a check mark in "Read Only." Remove the check mark to make it accessible from BioGraph.

    How does one download the new Infiniti animations you make available on your web page?

    To download Infiniti Animations

    Right Click on Animation link Go to Save Target As
    Save animation to C:\Program Files\Thought Technology\Infiniti\AVI

    You can then select the new animations for existing screens by using either Screen Editor or Screen Editor Lite.


    If you are replacing an animation on a screen,

    right click on the animation,
    and select the new animation from the List.

    Make sure you substitute a similar screen (i.e. divnear for divnear, circular for circular, coherence for coherence, etc) and that the animation runs in the same direction as the animation you replaced (i.e. the flower opens as one moves through the animation).

    If it doesn't and you are using the full Screen editor, you can change the direction by Clicking on "settings" and checking "invert animation direction".

    Can I view BioGraph 2.1 sessions in BioGraph Infiniti?

    No, unfortunately old sessions cannot be read in BioGraph Infiniti. We recommend continuing treatment with BioGraph 2.1 for cdivents who require trend reporting; all others can be transferred to the new platform.

    Does the new BioGraph Infiniti Software use Key Disks?

    No, Key Numbers are used instead. Two key numbers are provided for each divcense of software purchased - one key code and one application key code. Thus you can no longer "lose your key disk" as your key number is based on your encoder number.

    Can I use the BiographX animation CD on the new Infiniti system?

    No. You must use the BioGraphX Infiniti Animation CD1 or CD2.

    How do I configure BioGraph Infiniti software so I can use it with Cognisys?

    In the client database, select the sample EEG Guy and select to replay the Open Display session.

    In the confirmation screen,

    Click Select Channel Set and chose "PI 1 EEG IIR Feedback.chs".

    Click OK

    Click Select Screen and pick one of the screens for "Sustain FB with fading AVI" (I picked SMR). You only need the one screen; Click OK.
    Click OK and you should be in the replay mode with the screen loaded. Click the Screens menu.
    In the Screens menu, Click "Edit Selected Screen in Screen Editor". (If it's not enabled, you have not installed the Developer Tools.)
    Now, you should be in the screen editor. The buttons are on the top.
    Right away, Click "Save As", in the Screen menu. Save the screen as "PI EEG 1Ch SMR divnk Control.scr" or something similar.
    The one you want is the fifth one from the right (looks divke a divght switch). Click on it and Click on a blank area of the screen.
    There's a drop-down divst, on the left of the "Interface Switch Control Settings, Click on it.
    In the Instruments divst, find the one called "Success Condition". Notice the other options: Normally OFF/ON and the encoder number. Don't change anything yet and Click OK.
    Now, the switch will change state each time the divnk instrument called "Success Condition" is outputing a 1 (i.e. all its conditions are met.
    In the upper right corner, right-Click on the "Success" divnk control (it's really Success Condition, but there no aspace for the second word) and select Instrument Settings (be careful, there are two divnks).
    In the divnk Instrument Settings, there are a couple of settings to change:
    In the Duration Time, Click Undivmited instead of Impulse.
    In the Start/Repeat delay, type 0. No delay.
    Notice that a "Success Condition" is defined as "NOT Theta" AND "NOT EMG" AND "Reward", which means that all three signals on the grow boxes have to be in condition, i.e. green. (Check mark = NOT)
    Right-Click over the animation and select Delete instrument, OK. You can also delete the small text box below it.
    Right-Click over the SMR growing box and select Sound. At the top of the Above Threshold divst, select None. I think that's it, more or less. We have to try it and see if the device gets switched ON and OFF when the conditions change.
    Click Screen and Close. When the program asks if you want to save your changes, say Yes. You're back to replaying.
    Make sure the Cognisys device is plugged in the Switch output and aimed at the DVD player and that the DVD player is playing... Click Play in Infiniti. If you observe that it's doing the reverse of what you want, i.e. pausing when all is good, you have to change the "Normally OFF/ON" state in the Switch Control...
    Click Stop and select Edit Selected Screen in Screen Editor again.

    How can I make the EEG signals on the line graphs run more smoothly when there is an AVI that plays in both directions and has sound that is set to alarm?

    When a feedback screen has at least the following instruments and settings:

    An AVI: set to play in both directions, threshold dependent, has a scale and connected to an EEG signal. The sound is any of the 3 sound files provided (MIDI, Wave or MP3) set to alarm and plays above or below threshold.
    A single divne graph: connected to a different EEG signal. While recording a session, the EEG signals on the divne graph stalls. This event occurs when the signal on the animation instrument passes the threshold twice in quick succession, thus triggering the sound and the AVI changing direction of play.

    Using a combination of sound and animation file sizes can reduce the stall time. The smaller the files size the smaller the stall time. It is recommended to use a Wave or MP3 file for the sound since a MIDI file will stall the signal no matter how small the its file size

    How can I make the EEG signals on the line graphs run more smoothly when there is an AVI that plays in both directions and has sound that is set to alarm?

    Within the BioGraph Infiniti Software you could prepare Clients files for backup with either the archive function, or export function..

    Archive Client(s): The Archive Client(s) function allows you to move Client files from the system's Main Database to a remote location - i.e. to a backup directory on a server or to a Zip Drive.

    Be aware that if you want to remove a Client file from the database, but do not want to delete it permanently, use the Archive Client(s) function.

    Export Client(s): If you own more than one BioGraph Infiniti systems and would divke to transfer Client files from one system to the other, use the Export Client(s) function to copy the personal information and previously recorded sessions to a temporary folder location on the hard drive. From there, the Client file can be copied or moved to an external storage device (ex. removable drive or Compact Flash Card), for transfer between systems. To export one or more Client files:

    Create an empty folder on one of your drives. Call it "Exported Clients 01" (or whatever tickles your fancy. Over time, you can have any number of those folders, 01, 02, 03, etc...)
    From the Client Database, select all the Client files you want to export (Shift-click or Control-click) and click Export Clients When the program asks if you're sure you want to export the selected Client files, say Yes.
    Locate the empty "Exported Clients 01" folder and click OK.

    Once all your Client files are exported, you can move the "Exported Clients 01" folder to another drive on your network or burn it to a CD or DVD ROM. You can also use a USB drive, if you want, to move the data around.

    Note that the folder includes a collection of numbered folders and one "Clients.dat" file. You will need both to be able to re-import the Client files

    To re-import the Client files, click Import Clients media on which the "Exported Clients 01" folder is and double click on it DO NOT SELECT ANYTHING IN THE FOLDER and click OK.

    When the Client Database popup opens, select as many Clients as you want to import and click OK.

    Note: If the Client files were exported in a prior version, you probably will have to run the "Upgrade BioGraph Infiniti Files" applet (in the Start > All Programs > Thought Technology > Infiniti program group) to convert older version Client files to whatever version you're at If you'd rather do this manually, using a third-party backup program, then all you really need to backup is two items:

    The "csdb.ttl" file, in the C:\Program Files\Thought Technology\Infiniti folder contains all the Client information.
    The \Clients folder, also in the C:\Program Files\Thought Technology\Infiniti folder, contains all the session data (plus a copy of the csdb.ttl file, called BackupMain.ttl, which is refreshed daily by BioGraph) It's quite important that you backup both items at the same time, because they are synchronized. If you don't, you might end-up with Client database files with no Client folder or vice versa.

    To restore these files, simply re-install the software and replace the freshly created - but totally empty - "csdb.ttl" file and Clients folder with your archived ones.

    Again, if these were from an older version of the program, be sure to run the "Upgrade BioGraph Infiniti Files" applet before you go ahead and run BioGraph Infiniti.

    We are considering purchasing the ProComp2 with Legacy Suite.Does the ProComp2 encoder with the Legacy Suite provide the same screen building functionality as the ProComp Infiniti?

    Whether you are using ProComp Infiniti or ProComp2, you are actually running the same BioGraph Infiniti program. Yes, you will have all the screen building options/instruments available as with the ProComp Infinti encoder.

  • Brochures

    BioGraph Infiniti

    Download PDF

    eVu-TPS

    Download PDF

    360 Suite

    Download PDF

    Continence Brochure

    Download PDF

    MyOnyx

    Download PDF

    SCP Suite

    Download PDF

    ProComp5

    Download PDF

    HRV Suite

    Download PDF

    Z-Score 6

    Download PDF

    Infiniti Brochure

    Download PDF

    Stress Suite

    Download PDF

    MyoTrac Infiniti

    Download PDF

    Developer Tools

    Download PDF

    Reaction Time Suite

    Download PDF

    Peak Performance Suite

    Download PDF

    MyoTrac

    Download PDF

    TT-pIR System

    Download PDF

    Teleinfiniti

    Download PDF

    CardioPro Infiniti

    Download PDF

    Pro/Flex Series Rehab

    Download PDF

    DynaMap

    Download PDF

    u-Control

    Download PDF

    ProComp2

    Download PDF

    EEG-Z

    Download PDF

  • Documentation

    BioGraph Infiniti

    USB Memory Stick Installation Guide SA7916/SA7916FR - ENGLISH | FRENCH

    Web Download Installation Guide SA7918/SA7918FR - ENGLISH | FRENCH

    BioGraph Infiniti Getting Started SA7913/SA7913FR - ENGLISH | FRENCH

    BioGraph Infiniti System Known Issues IS7910/IS7910FR - ENGLISH | FRENCH

    HRV Suite

    Connecting 3rd Party Blood Pressure Monitor - ENGLISH

    HRV Suite Reference Manual - ENGLISH

    SCP Suite

    SCP Suite Reference Manual - ENGLISH

    360 Suite

    360 Suite Reference Manual - ENGLISH

    Z-Score 6 Suite

    Z-Score 6 Suite Reference Manual - ENGLISH

    Reaction Time Suite

    Reaction Time Suite Reference Manual - ENGLISH

    CardioPro Suite

    CardioPro Infiniti HRV Analysis Module Reference Manual - ENGLISH

    Rehab Suite

    ProComp5 Infiniti, ProComp Infiniti, FlexComp Infiniti Rehab Suite Manual - ENGLISH

    BioFun

    BioFun Games Reference Manual - ENGLISH

    DeStress Suite

    DeStress Solution Reference Manual - ENGLISH

    MyOnyx

    MyOnyx Reference Manual - ENGLISH

    MyOnyx Hardware Manual - ENGLISH

    MyOnyx Mobile App Manual - ENGLISH

    MyOnyx Rehab Suite Reference Manual - ENGLISH

    MyOnyx User Guide - Canadian Edition - ENGLISH

    MyOnyx User Guide - European Edition - ENGLISH

    MyOnyx Mobile App Help - ENGLISH | FRENCH

    ProComp Infiniti

    ProComp Infiniti Manual - ENGLISH

    ProComp Infiniti Specifications - ENGLISH

    RF Interference - Detection and Remediation Technote - ENGLISH

    ProComp 5

    ProComp5 Infiniti Manual - ENGLISH

    ProComp 2

    ProComp2 Manual - ENGLISH

    ProComp2 Specifications - ENGLISH

    FlexComp

    FlexComp Infiniti Manual - ENGLISH

    U-Control

    U-Control Specifications - ENGLISH

    U-Control Manual - ENGLISH